

Reading the River Before Taking the Plunge
Stepping out of the boat is not a sign that a rapid has beaten you. It is a deliberate move that turns uncertainty into information. From the bank, you can slow the scene down, identify the main current, check the landing zone, and decide whether the rapid suits the group, the water level, and the available rescue cover. A careful scout is often the difference between paddling a demanding feature with a clear plan and entering it with little more than hope.
River perspective can be deceptive. From the water, the horizon rises, waves hide rocks, and the speed of the current compresses decisions into seconds. From bank level, the shape of the river becomes easier to separate into channels, tongues, eddies, seams, and hazards. That higher angle can reveal a line that was invisible from the eddy below, but it can also make drops appear smaller and distances harder to judge. Use the bank to build an instant mental topographic map, then apply a disciplined four-step scan: find the downstream V, identify hydraulic hazards, map usable eddies, and mark the moves and safety positions that matter most. Before launching, check the access, footing, weather, water level, and protective kit. A reliable scouting approach for whitewater always begins with conditions rather than confidence.
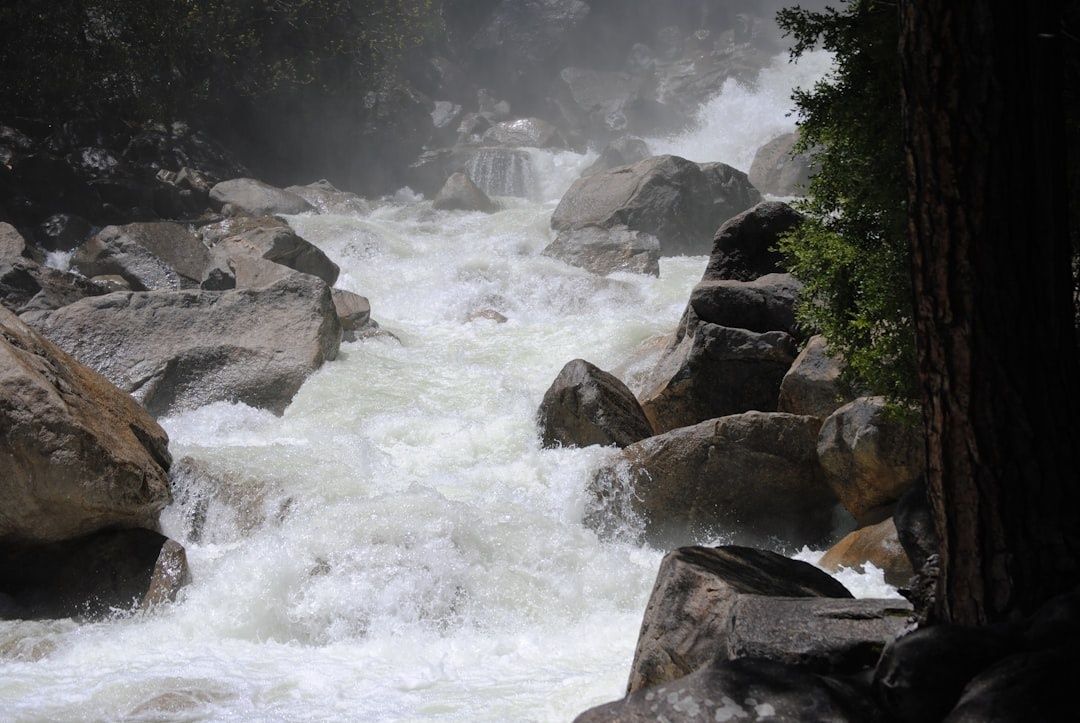
Finding the Downstream V and Reading Channel Flow
Start by ignoring the spray and looking for the smoothest fast-moving water. Where two current streams converge, the surface often forms a green tongue that narrows downstream into a V. This downstream-facing V usually marks the deepest, most continuous route through a shallow or broken section. The water may look deceptively calm at its head, but the smooth tongue often gathers speed as it approaches the first wave or drop. Follow it with your eyes beyond the initial feature. A good entry is only useful if it leads towards a runnable exit.
Do not confuse a friendly downstream V with an upstream-pointing V. A V that points towards you can indicate water splitting around a submerged rock, ledge, or other obstruction. The current accelerates around the object and may form converging ripples or a darker patch immediately downstream. The feature itself may be hidden, particularly in high water. Look for associated clues: boils, standing waves that appear to rise from one fixed point, diagonal shoulders, and water that suddenly changes direction. The National Park Service Swiftwater Rescue Manual treats river dynamics, powerful water, entrapments, strainers, and low-head dams as connected parts of a wider risk assessment, not isolated visual puzzles.
Next, read the speed and gradient of the approach. A broad sheet of quick water may leave little room to set an angle before a constriction. A visible drop in the riverbed can hide behind a uniform wave train, while a sudden flattening may create a powerful hydraulic at the foot of a ledge. Look upstream as well as downstream to understand the available set-up distance. Then identify what happens after the rapid. A clean tongue into a wide pool offers more margin than the same tongue aimed at a rocky bank, a strainer, or a narrow siphon.
- Trace the fastest continuous current from the entry eddy to the first major feature.
- Mark downstream-facing green Vs as possible tongues, then verify their depth and exits.
- Treat upstream-facing Vs, fixed boils, and abrupt surface changes as warnings until proven otherwise.
- Assess speed, gradient, width, and stopping distance before choosing the entry gate.
Spotting Recirculating Stoppers and Hydraulic Hazards
A hydraulic forms when water drops over an obstruction and curls back upstream. From the bank, look for a distinct foam line or backwash at the top of the feature, followed by a green or aerated face and a boiling pile below. The surface may appear organised at the crest but chaotic behind it. Foam that repeatedly circulates in place is especially useful evidence because it shows that the water is not simply moving downstream. A wave that travels with the current is generally less retentive than a hole that keeps recycling water, boats, and swimmers.
Evaluate the hole in relation to the paddler and the flow, not by appearance alone. A low, broad wave train may allow a kayak or canoe to punch through, while a compact, steep stopper can grab the bow and fold a boat back into the recirculation. Aerated water reduces buoyancy and makes swimming harder. Watch the shoulders, because a diagonal entry can send a boat sideways into the strongest part of the reversal. If the feature is river-wide, if there is no visible bypass, or if the recovery pool is short and obstructed, the correct decision may be to portage.
Low-head ledges deserve particular respect. They can look like harmless lines of white water from a high bank, yet their uniform reversal may extend across the whole channel. A flat horizon immediately above the drop, a continuous foam pile, and water returning towards the lip are strong warning signs. Never assume that a familiar rapid remains unchanged. The Schroon River guidance records conditions where a major drop is not visible from the approach and recommends scouting in advance, with flow levels changing both the safest line and the severity of hazards. A feature that is playful at one level can become sticky, shallow, or dangerously powerful at another.
| Surface clue | Likely meaning | Decision focus |
|---|---|---|
| Clean green tongue | Convergent current and possible deep line | Check the exit and downstream hazards |
| Foam held in a fixed line | Backwash or recirculation | Assess retentiveness and bypasses |
| Travelling white waves | Wave train moving downstream | Choose angle, speed, and spacing |
| Upstream-facing V and boils | Submerged obstruction or broken ledge | Avoid the centre of the warning pattern |
| Continuous river-wide reversal | Potential low-head dam or full-width stopper | Portage unless a qualified assessment confirms a safe route |
Mapping Sanctuary Eddies and Dynamic Safety Zones
Once the main hazard is understood, search for places where the current slows or reverses. Bank eddies behind large rocks, inside bends, below small drops, and along irregular shorelines can provide staging points. Mid-stream eddies may be harder to spot, but look for glassy patches surrounded by turbulent water, surface foam rotating in a loop, or a small pocket of calm behind a mid-channel obstruction. These spaces are not automatically safe. Their value depends on whether a paddler can reach them, stay upright inside them, and leave without being pushed into a worse feature.
The eddy line is the boundary between opposing flows. It may appear as a thin seam, a jagged streak of foam, or a boiling diagonal that twists across the current. Crossing it requires a committed angle and an active edge. A boat that enters square to the seam can broach, flip, or be spun unexpectedly. From the bank, identify the direction of both flows and estimate where the seam will meet the boat. A useful eddy has a visible approach from the planned line, enough room to slow down, and a calm interior rather than a narrow pocket filled with rocks.
Check every proposed sanctuary against what lies downstream. An eddy below a drop may be an excellent recovery zone, but an eddy beside a steep bank may feed directly into undercut rock, a tree, or a siphon. The same principle applies to a swimmer. Cold water, wind, and distance can turn a straightforward swim into a serious incident, particularly on wide rivers where a boat is difficult to recover. Guidance from the Grand Canyon inflatable kayaking account emphasises self-rescue, suitable exposure protection, careful communication, and scouting changing rapids rather than relying on someone else”s earlier assessment.
- Identify at least one primary catch-eddy and one alternative recovery pocket.
- Trace the approach to each eddy from the intended line, including the required ferry angle.
- Study the eddy line for boils, diagonal seams, rocks, and sudden changes in boat stability.
- Confirm that the eddy does not lead towards strainers, undercuts, siphons, or an unrecoverable bank.
Marking Critical Must-Make Moves and Setting Throw-Bag Points
A bank-side plan becomes useful when it is tied to physical markers. Choose a tree, boulder, fence post, bend, or distinctive break in the bank as a trigger point. That marker should tell the paddler when to start a ferry, drive towards a tongue, set an edge, or prepare for a brace. Do not wait until the hazard is directly ahead. Whitewater decisions need time for the boat to respond, and a fast current can remove that time in seconds.
Rescue planning should be equally specific. A throw bag is most effective when the rescuer has secure footing, a clear view, and enough downstream access to reach the swimmer”s likely path. Avoid standing directly above a turbulent drop or close to an unstable bank edge. The rope operator must understand how to deploy without becoming entangled, and all paddlers should know the agreed signals. River authorities and navigation bodies, including the Environment Agency, publish local information through resources such as the River Wye Paddle Guide. Local knowledge can reveal access restrictions, changing features, and suitable landing points that a visual scout alone cannot establish.
- Scan the flow. Find the downstream V, trace the main tongue, and identify where the current accelerates, drops, or divides.
- Scan the hazards. Locate stoppers, ledges, strainers, undercuts, rocks, and any feature that could trap a boat or swimmer.
- Scan the recoveries. Select catch-eddies, downstream pools, landing banks, and alternative lines, then confirm that each route remains clear.
- Scan the response. Mark the must-make turn, agree signals, position throw bags, and decide whether to run, walk, or regroup.
Before returning to the boat, communicate the plan in plain language. Describe the entry, the main feature, the exit, the recovery point, and the signal for stopping or portaging. Place shore-based safety cover at a likely flush point rather than where it is merely convenient to stand. If a swimmer is carried past the first position, a second rescuer may need to cover the next calm zone. Swiftwater rescue training is essential because reading a manual does not create rescue proficiency. The National Park Service manual explicitly warns that rescue work contains potentially fatal hazards and requires supervised practice with qualified instructors.
Lock In Your Mental Line and Commit With Composure
After the scan, reduce the rapid to one clear downstream trajectory. Picture the boat entering the tongue, meeting the first wave at the chosen angle, driving or edging towards the marker, and finishing in the selected pool or eddy. The picture should include the next move, not just the first obstacle. Keep the route simple enough to remember under pressure, and set a fallback line if the boat misses the ideal entry.
Scouting is a decision tool, not a test of nerve. If the feature remains unclear, the water level has changed, the landing is poor, or the rescue plan is weak, walk the bank without hesitation. A portage preserves energy and keeps the group ready for the next suitable rapid. When the line is appropriate, launch with intent, use solid strokes, maintain awareness of the exit, and let preparation replace panic. Respect the water, check the footing, choose the right kit, and build confidence steadily. Clear vision on the bank creates calmer choices on the river.